Laser Mapping
Goal
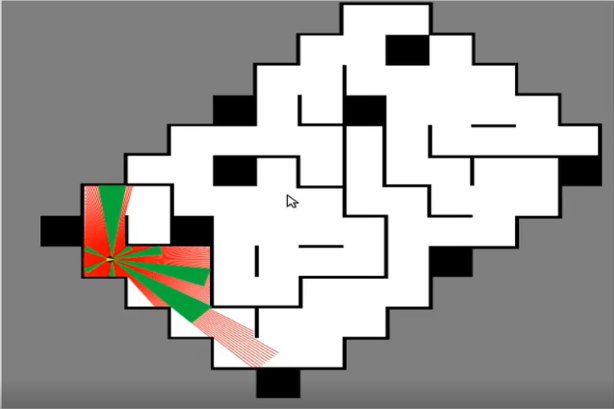
The objective of this practice is to implement the logic of a navigation algorithm for a vacuum using laser mapping. The main objective will be to cover the largest area of a house using the programmed algorithm.

Instructions
This is the preferred way for running the exercise.
Installing and Launching
-
Download Docker. Windows users should choose WSL 2 backend Docker installation if possible, as it has better performance than Hyper-V.
-
Pull the current distribution of Robotics Academy Docker Image:
docker pull jderobot/robotics-academy:latest
-
In order to obtain optimal performance, Docker should be using multiple CPU cores. In case of Docker for Mac or Docker for Windows, the VM should be assigned a greater number of cores.
-
It is recommended to use the latest image. However, older distributions of RADI (Robotics-Academy Docker Image) can be found here.
How to perform the exercises?
-
Start a new docker container of the image and keep it running in the background:
docker run --rm -it -p 7164:7164 -p 2303:2303 -p 1905:1905 -p 8765:8765 -p 6080:6080 -p 1108:1108 -p 7163:7163 jderobot/robotics-academy -
On the local machine navigate to 127.0.0.1:7164/ in the browser and choose the desired exercise.
-
Wait for the Connect button to turn green and display “Connected”. Click on the “Launch” button and wait for some time until an alert appears with the message
Connection Establishedand button displays “Ready”. -
The exercise can be used after the alert.
Enable GPU Acceleration
- Follow the advanced launching instructions from here.
Where to insert the code?
In the launched webpage, type your code in the text editor,
from GUI import GUI
from HAL import HAL
# Enter sequential code!


while True:
    # Enter iterative code!
Using the Interface
-
Control Buttons: The control buttons enable the control of the interface. Play button sends the code written by User to the Robot. Stop button stops the code that is currently running on the Robot. Save button saves the code on the local machine. Load button loads the code from the local machine. Reset button resets the simulation(primarily, the position of the robot).
-
Frequency Input: This input shows the running frequency of the iterative part of the code (under the
while True:). A smaller value implies the code runs less number of times. A higher value implies the code runs a large number of times. The numerator is the one set as the Measured Frequency who is the one measured by the computer (a frequency of execution the computer is able to maintain despite the commanded one) and the input (denominator) is the Target Frequency which is the desired frequency by the student. The student should adjust the Target Frequency according to the Measured Frequency. -
RTF: RTF (Real Time Factor): The RTF defines how much real time passes with each step of simulation time. A RTF of 1 implies that simulation time is passing at the same speed as real time. The lower the value the slower the simulation will run, which will vary depending on the computer.
-
Debugging Console: This shows the error messages related to the student’s code that is sent. The student can also use it to visualize the output of the print() function.
Robot API
HAL.getPose3d().x- to get position x of the robotHAL.getPose3d().y- to get position y of the robotHAL.getPose3d().yaw- to get the orientation of the robotHAL.motors.sendW()- to set the angular velocityHAL.motors.sendV()- to set the linear velocityHAL.getLaserData()- to get the data of the LIDARHAL.getSonarData_0()- to get the sonar data of the sonar 1HAL.getSonarData_1()- to get the sonar data of the sonar 2HAL.getSonarData_2()- to get the sonar data of the sonar 3HAL.getSonarData_3()- to get the sonar data of the sonar 4HAL.getSonarData_4()- to get the sonar data of the sonar 5HAL.getSonarData_5()- to get the sonar data of the sonar 6HAL.getSonarData_6()- to get the sonar data of the sonar 7HAL.getSonarData_7()- to get the sonar data of the sonar 8
# EXAMPLE OF HOW TO SEND INFORMATION TO THE ROBOT ACTUATORS
vel = CMDVel()
myW=x*(self.motors.getMaxW())
myV=-y*(self.motors.getMaxV())
vel.vx = myV
vel.az = myW
self.motors.sendVelocities(vel)
# OR
self.motors.sendAZ(vel.az)
self.motors.sendV(vel.vx)
Theory
Implementation of laser mapping for a vacuum is the basic requirement for this exercise. First, lets see how mapping with known possitions works.
Mapping with known possitions
Coverage Path Planning is an important area of research in Path Planning for robotics, which involves finding a path that passes through every reachable position in its environment. In this exercise, We are using a very basic coverage algorithm called Random Exploration.
Analyzing Coverage Algorithms
Mapping with known positions assumes that the current position of the robot is known. This technique consists of converting the distance measurements of the different laser beams into Cartesian coordinates relative to the robot. The distance of the beams reflects the existence of an obstacle; therefore, these Cartesian coordinates are inserted reflecting obstacles in an occupation grid with respect to the current position of the robot. This technique is not entirely real because in most cases, the position of the robot is unknown. Therefore, other techniques such as SLAM are used.
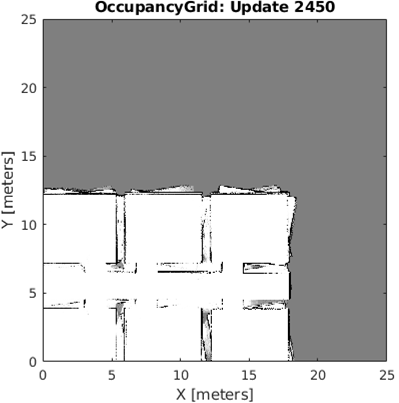
Occupancy grid
An occupation grid is a discretization of the robot’s environment in cells. This discretization will be given by the size of the world in which the robot is located. With an occupation grid, a matrix is handled whose cells will contain a probability value, which indicates the certainty that in that position there is an obstacle (1), there is free space (0), or it has not been explored for the moment (gray space). The occupation grids were initially proposed in 1985 by Moravec and Elfes. The biggest advantage of these types of maps is that they are easy to build and maintain, even in large environments. Also, it is easy for a robot to determine its position within the map just by knowing its position and orientation, since the geometry of the cells corresponds to the geometry of the terrain. On the other hand, the basic problem with this type of map is the large amount of memory required for storing the information.
Illustrations

Videos
This solution is an illustration for the Web Templates
Contributors
- Contributors: Vladislav, Jose María Cañas, Nacho Arranz.
- Maintained by Juan Manuel Carretero.